We are super excited to share our experience with building a drone with NCLab and today’s first test flight. Objectives:
- Attract students to 3D modeling by showing them a cool real application.
Design criteria:
- Frame should be made with the 3D modeling app in NCLab which is free for everybody to use. Everybody should be able to either use the design as-is, or tweak it to their own needs.
- One must be able to assemble the drone just as a Lego – without soldering, cutting wires, or any other advanced operations that middle school students would not be able to do in the classroom. Not even screws or hot glue.
- All parts must be standard and easy to order online.
- The total cost must not exceed $100.
Mission accomplished! This video shows our first test flight today. Special thanks to our friend and drone expert Ben Sealy (blue shirt, holding the transmitter, shown towards the end of the video). Below we’ll describe the 3D model, list all parts and their prices, and show how easy it is to assemble everything together.
3D Model of the Frame
The frame is extremely light, durable, and intentionally very simple. It was made using only rings, arcs, and rectangles. It is an extruded 2D geometry free of complex genuinely 3D features, in order to be printable on the widest possible range of 3D printers which are available at schools. Click on the screenshot to launch an STL file viewer. You can download the STL file using the Export menu.
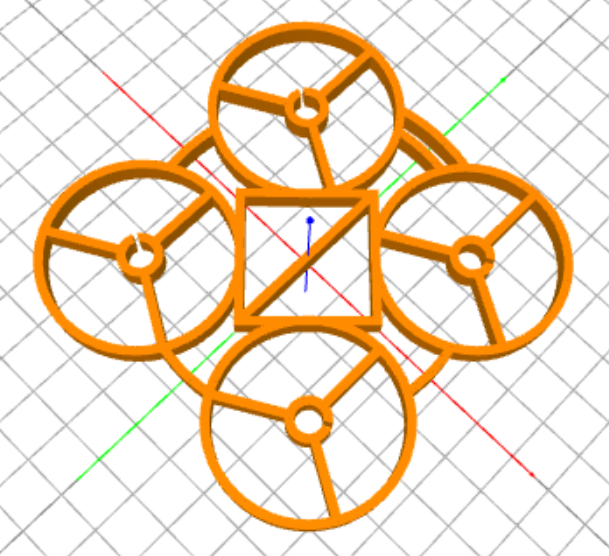
The double arc indicates front side.
Downloads
The source code can be viewed / edited / run here. NOTE: This is already the 4th generation with many improvements that are based on our flight experience. You can also just download a printable STL file here. The model will be polished and turned into a super-cool minicourse for the Hour of Code.
List of Parts
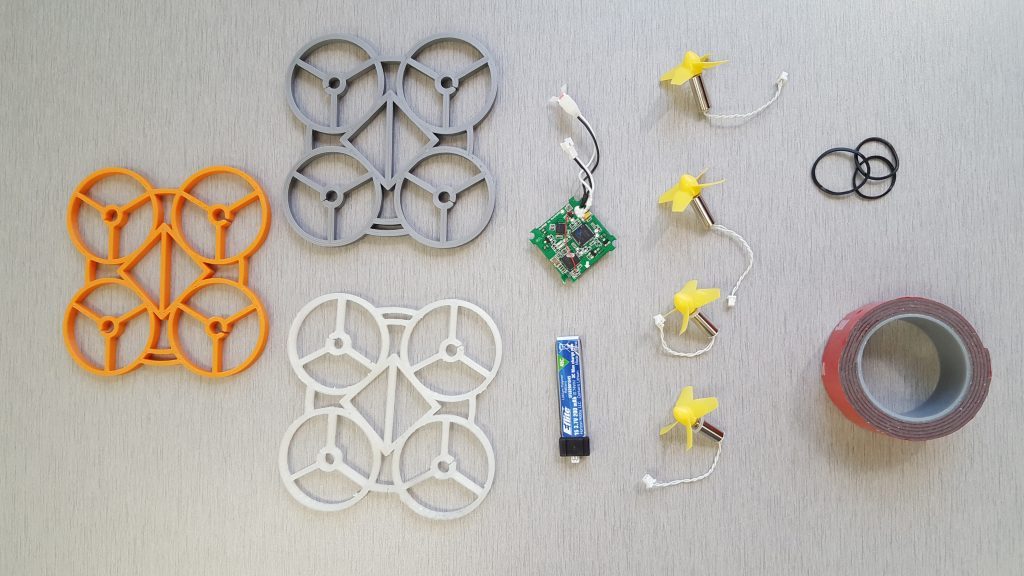
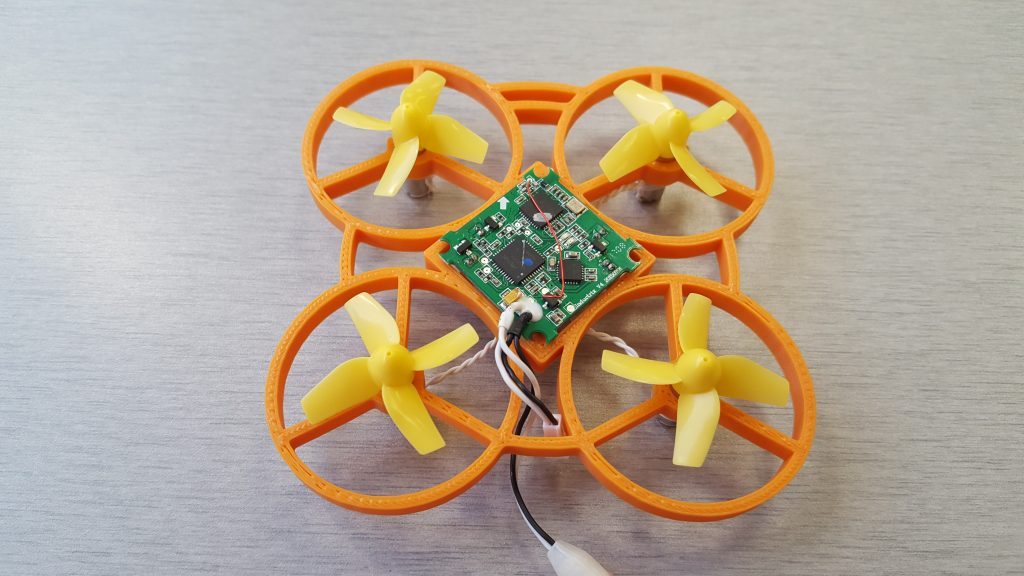
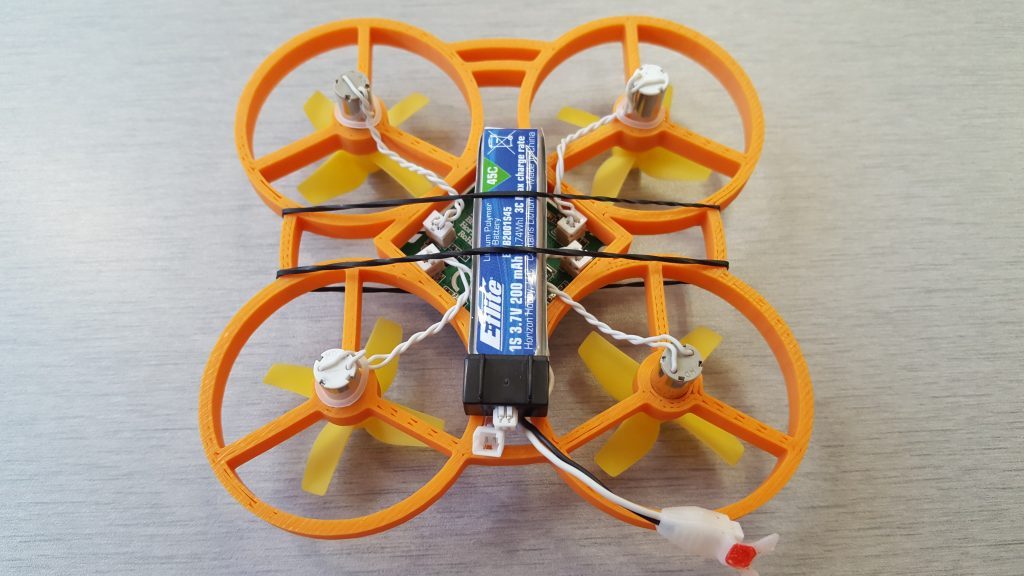
This picture shows the frame printed using three different types of plastic – orange ASA (Acrylonitrile Styrene Acrylate), grey PLA (Polylactic Acid) and white nylon. We used the orange one to assemble the first prototype. But for the next one we’ll probably use nylon because of how extremely flexible it is – amazing, basically indestructible. The green part is the flight controller (receiver), the blue part is the battery, the yellow parts are motors with propellers, the black rings are rubber bands (100 for $1 in Walmart), and the red thing is two-sided tape. You will also need tweezers to plug in the motors to the flight controller.
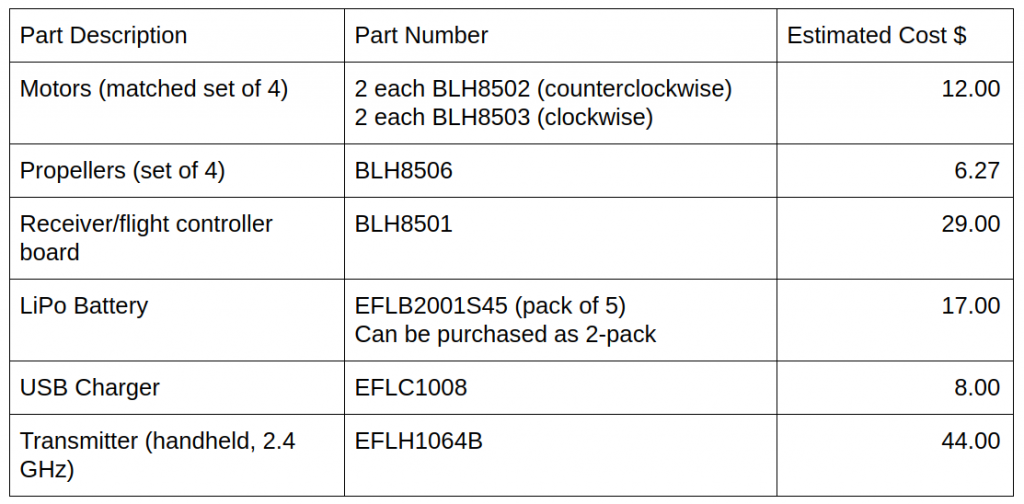
Part Numbers and Pricing
The parts come from Blade Helicopters “BLH” and Eflite “EFL”. Experts recommended to look for aftermarket in particular for motors, propellers and batteries. The aftermarket pieces are not only cheaper but usually better quality.
Plug-and-Play Assembly
First, glue the flight controller to the center part of the frame using double-sided tape. In the next model, we will make the diagonal bar of the center square 3x wider for more adhesive strength.
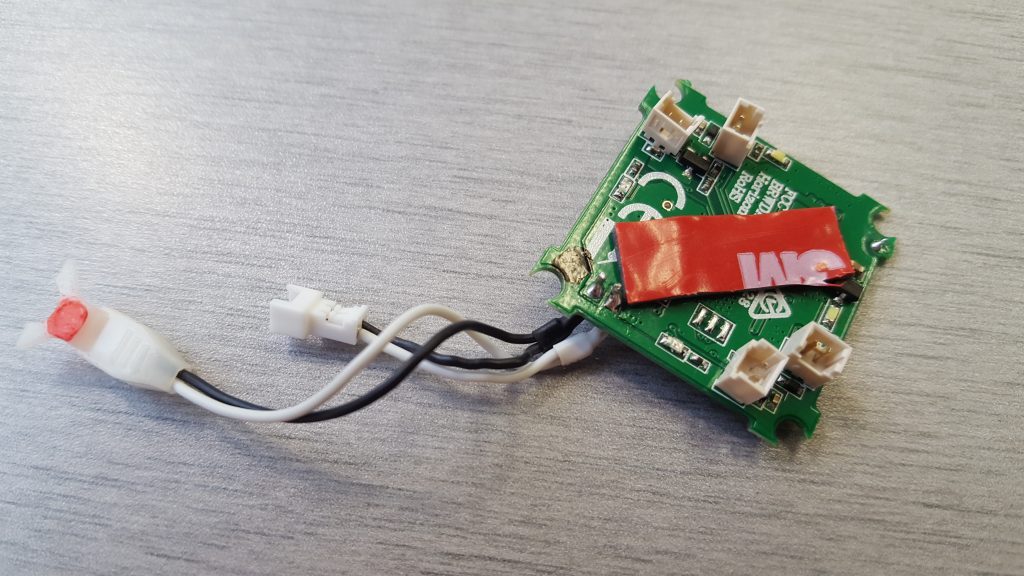
The flight controller is glued to the middle of the top surface of the frame. The double-arc is the front.
There are two types of motors – clockwise (CW) and counter-clockwise (CCW). You need a set of four which contains two CW and two CCW. They are color-coded differently – see below.
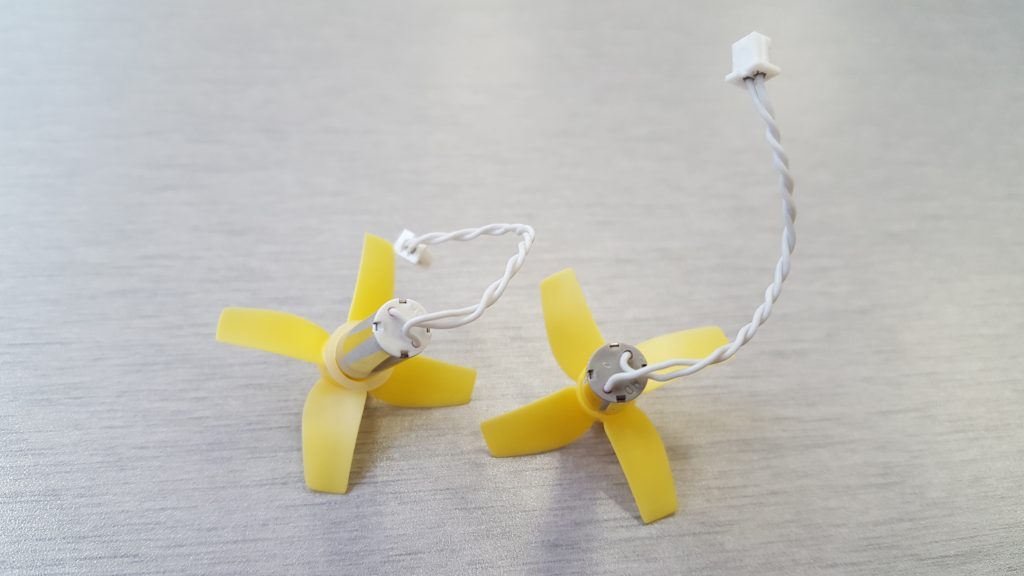
This image shows how the CW and CCW motors are attached to the frame (they are simply pushed into the corresponding holes in the frame). Tweezers come handy while connecting the motors with the flight controller.
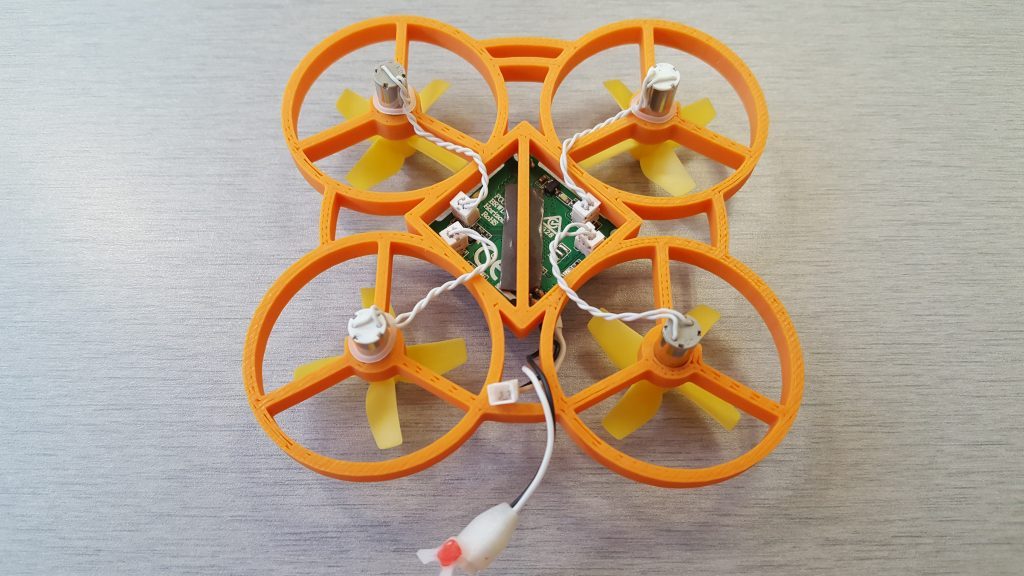
Last – the rubber bands are used to attach the battery to the frame. The battery is connected with the flight controller using the red-marked mini cable (right before flight).
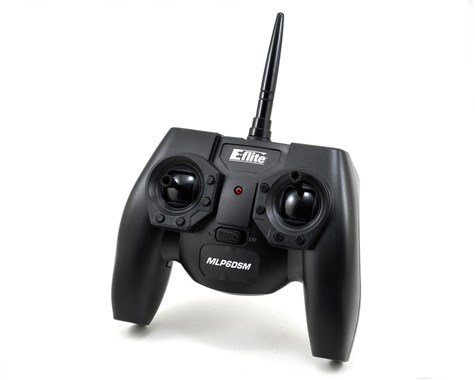
Transmitter
You still need to buy a transmitter which is not shown above. We use the E-flite MLP6DSM 6CH SAFE 2.4GHz Transmitter which normally costs around $50 just because we were able to get it for $25. But the E-flite transmitter mentioned in the list of parts above (EFLH1064B) will work as well.
Ready for a Test Flight?
Be ready for a humble beginning. Remember those days when everyone around you was able to ride a bicycle but it was an inexplicable mystery for you? Mastering drone flight is not trivial. The stick on the left controls thrust and yaw, the stick on the right then pitch and roll. We recommend watching a few Youtube videos first, and then going to a park with a vast green area free of obstacles. Unless you like to crash into walls right away – of course it’s fun too. The good news is that the extremely low weight of the drone combined with the durable design of the frame make it almost impossible to break. Happy crashing!