Few days ago, kids from the Schurz Elementary School in Mineral County School District, supervised by Jeremy Elsmore, designed a whistle. I was amazed by the idea of creating something that works. So far, all 3D models I saw were just for display. Here it is. The ball inside the chamber is cool. Once printed, it will remain trapped there forever.
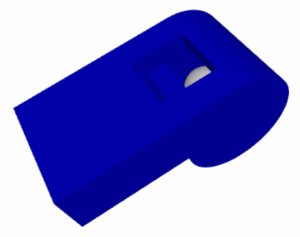
Naturally, the students were anxious to see whether the 3D print would produce sound. Me too.
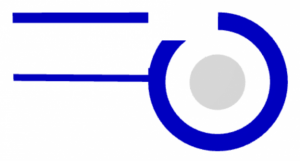
But unfortunately, it did not. The symmetry cutplane reveals that all the air blown into the whistle leaves through the large opening before entering the chamber, and even before hitting the opposite edge.
Second Design
Kids sometimes tend to give up when something does not work. This example can be used to show them that when something does not work, that’s not the end at all. On the contrary – it’s the beginning. To force the air into the chamber, the design was changed:
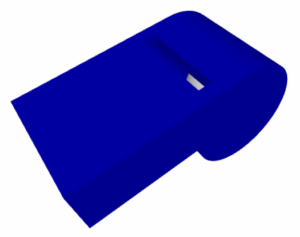
To better see how the whistle is arranged inside, here is the symmetry cutplane again:

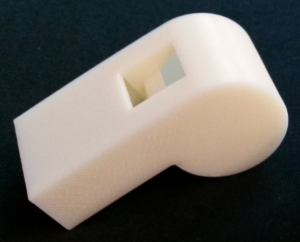
And, this is the 3D print:
Nice, right? Do you think that it worked? Nope. Argh!
Third Design
The whistle is not a simple thing at all. We googled for schematics of whistles but those we found were not very useful. We also watched several YouTube videos showing how to create a whistle. But all of them were using a different design, without the ball and chamber, based just on a short straight piece of wood. Nevertheless, in all of them, the edge that is hit by the streaming air was sharp. That’s what we did in the third design:
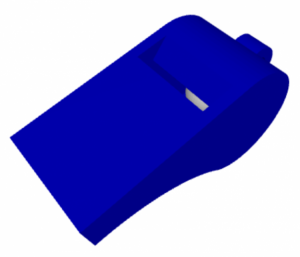
Again, here is the symmetry cutplane that reveals the internals:

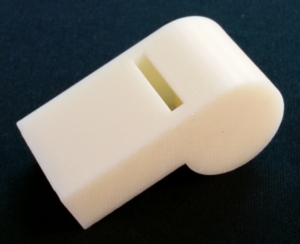
And finally, this is the 3D print:
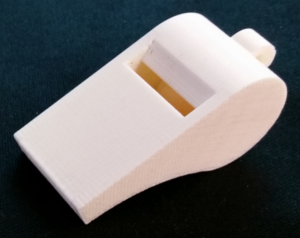
Do you think that it worked? Take a guess. If you think it did, you’re right! It worked!